How to Flatten a PDF Document
When using the SIGNiX system for e-signature purposes, there may come a need to flatten a PDF before you upload it into a new transaction. The act of flattening described here is done through the “Print to PDF” method and it can help to resolve a number of issues, such as merging fill-able fields into the document and help to make scanned documents more compatible.
Steps to Flatten:
- Open the PDF document on your computer.
- Click on “File” at the top left, and then click on “Print” in the drop-down menu.
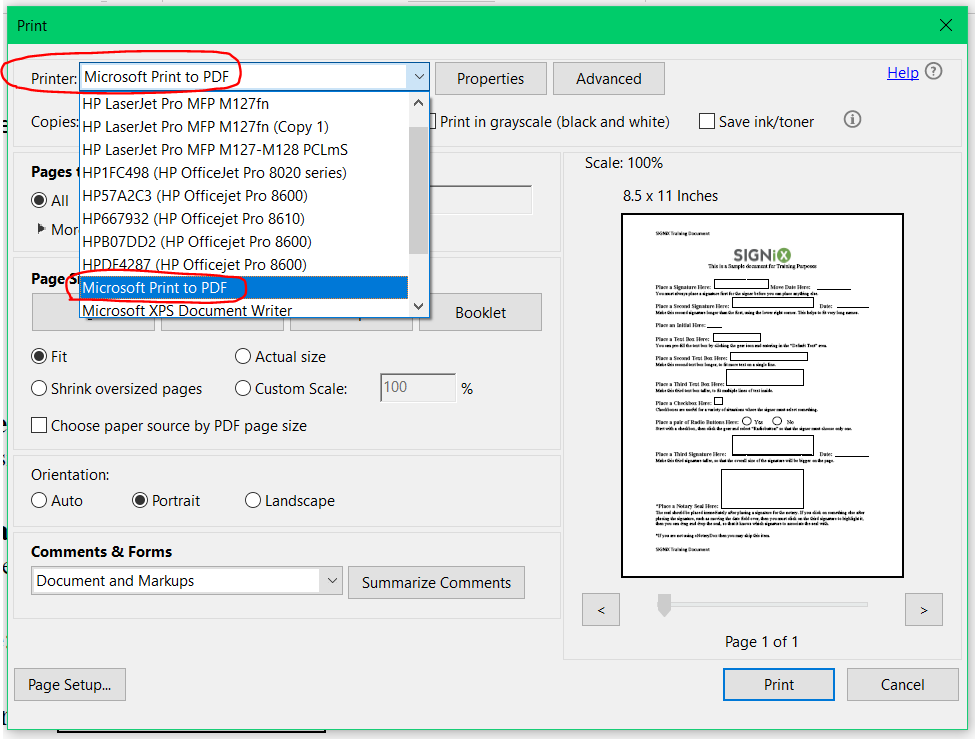
- In the area called “Printer” at the top of the new Print window, where you can select where you want the document to be printed. Instead of sending it to a physical printer, you will want to select a PDF program. If there are several options, please pick one. We recommend trying "Microsoft Print to PDF" first as that often produces the best results.
- Click on the “Print” button and wait a moment as it is processing.
- The program you picked may ask you to give your new PDF document a name and to choose where you want to save it on your computer.
- We suggest that you give the new PDF file a new name, to make it clear that this one is the flattened version and is not the original document you started with.
- The original document will remain on your computer as well, and so now you should have two versions of the same PDF.
Occasionally Adobe Reader will enlarge the file when flattening. If this happens, we suggest opening your document in another PDF program, such as Foxit PDF Reader, to flatten the documents following these same steps.