What is ReadyDox?
With ReadyDoX, your company can offer your own customers a simple, convenient, and quick way to input information into an online form and then securely execute the document(s) by signing electronically. No programming or integration needed! See here for a detailed demonstration.
What can you do with ReadyDox?
- Instead of a PDF on your website, use a ReadyDox link and let customers fill and sign forms online instead of waiting for them to be printed, faxed, scanned, and/or emailed.
- Companies can email blast prospective clients with a ReadyDoX link embedded in the content, increasing engagement and revenue.
- Have ReadyDoX links for all your contracts/forms on your representatives' tablets or smartphones so clients can sign instantly in person. Links can be stored as apps/bookmarks for fast access.
I have ReadyDox, how does it work?
First, create a template for the scenario you need the ReadyDox link to work with. You will add a signer using the "Placeholder" option, since you don't yet know the signer's name and email address. Add the document(s) you need and place the signature(s) and other tasks needed. Then save the template and give it an easy to remember name.
Open the template, and go to the Send tab, where you will see the below options at the very bottom of the screen. Fill out the two blank fields, save the template again, then click the "Add" button to create a ReadyDox link for you to use. If you need to change the fields for any reason, click the "Delete" button that will appear and make your changes. Remember to save the template each time you make changes, and only "Add" the link back when your changes are finished.
 Here, the "Client Name" field refers to the Company or Person to whom the documents are going to be delivered once they are signed and completed. For example, you could enter "Human Resources" here or your own company's name. Use whatever fits your ReadyDox scenario the best.
The name of the document(s) being signed will also appear on the screen for your signers, so be sure the PDF file names are accurate and clear. You may need to go back a few steps in the template process and upload a document with a better name, if it does not appear the way you wish.
You can also enter a "Welcome Message" in the appropriate field as well, as a way to help greet and instruct your signers once they begin using the ReadyDox link to create and sign documents.
Below is an example of what the screen might look like for your signer:

You can add more than one signer to a ReadyDox template, however keep in mind that the First Signer must know who the other Signers are at the time that they use the link to start the transaction.
If your secondary signer will always be the same person, for example someone in HR accepting new employee paperwork, then you can enter that person as the second signer. Otherwise, if you don't know who they will be, use the place holder again.

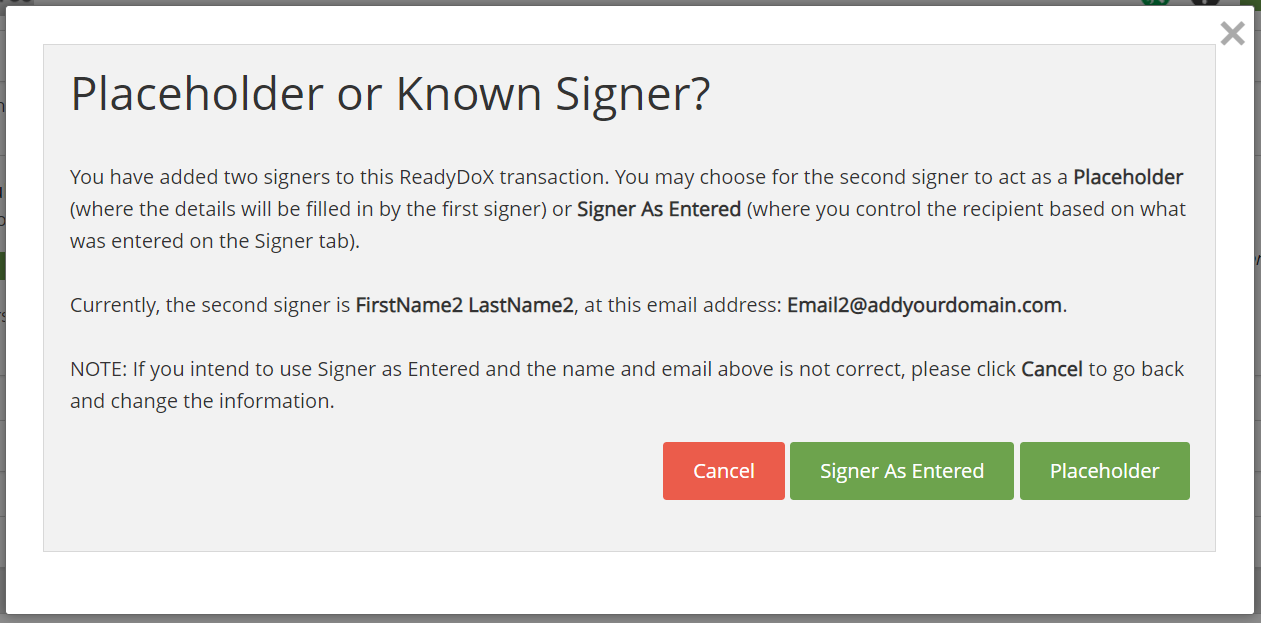
When you are on the Send screen and Add the ReadyDox link, a message will appear reminding you about the second signer and confirming which option you want to choose. If you used a placeholder because you don't know the second signer, click the "Placeholder" button. If you entered a known second signer with a real name and email, then click the "Signer as Entered" button.
If you selected the Placeholder option, your first signer will be asked to enter not only their own information when beginning the transaction, but they will also be asked to enter the second signer's information up front as well, before they are allowed to proceed with signing the document(s).

To experience this feature firsthand, you can complete a Sample ReadyDox document by clicking here.