The Signer Attachment feature was built with client feedback in mind. Some situations call for the signer to upload their own document during the signing process, for example they might upload a photocopy of their drivers license while filling out forms sent to them.
This feature can be turned on by request, so please contact your Sales Rep to discuss further.
How to Use Signer Attachments:
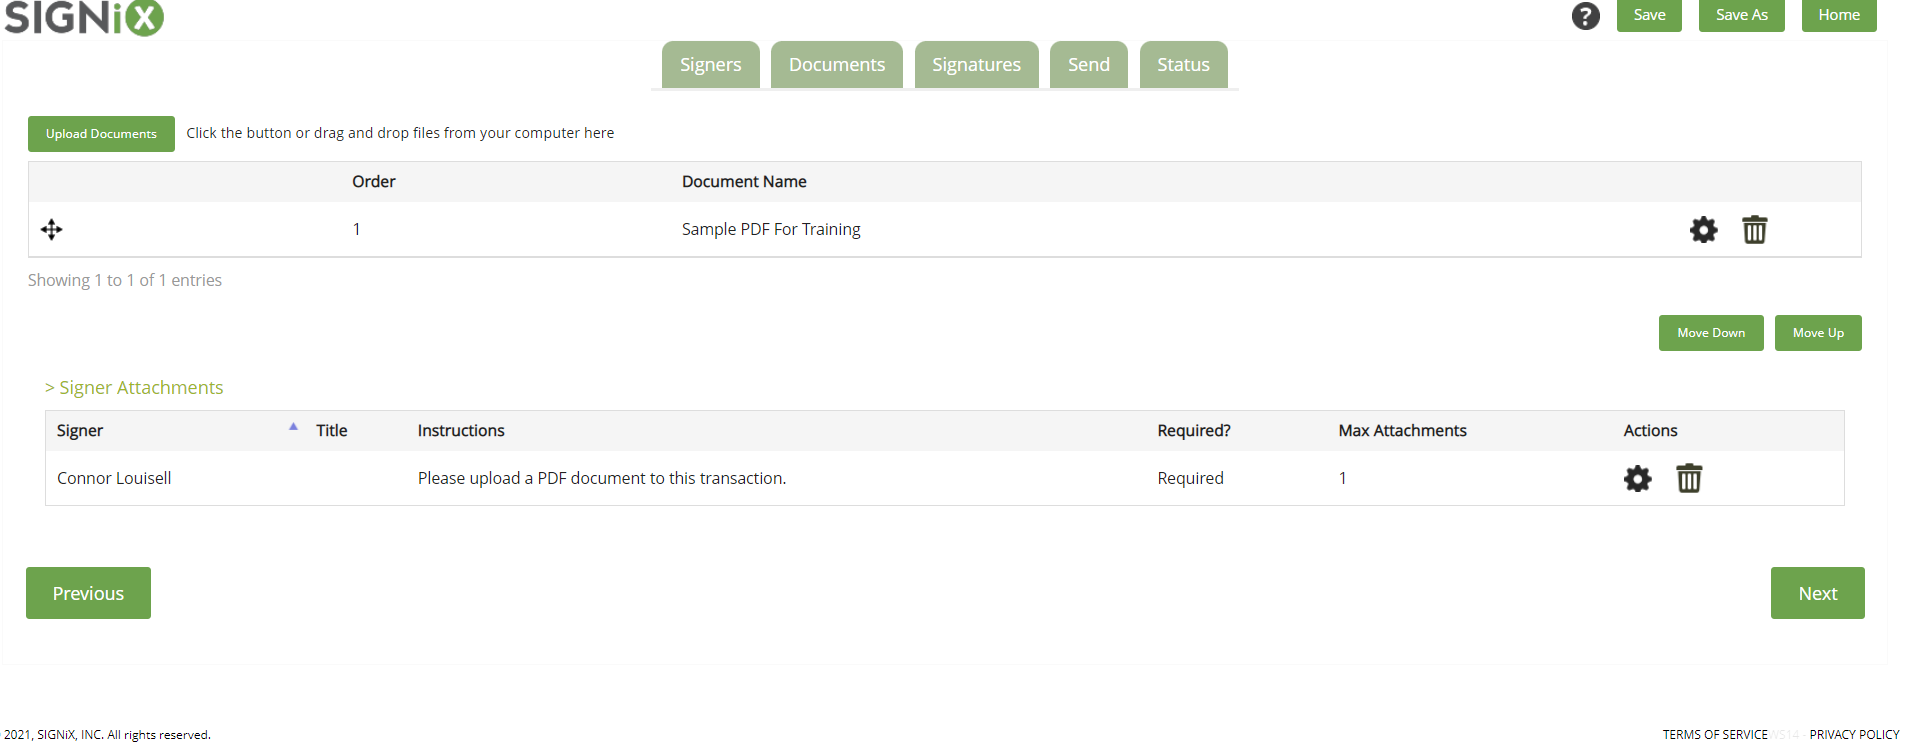
You should see a link on the "Documents" screen, below the document area, that says "Signer Attachments" and you will need to click on that to turn the feature on for the current transaction you are creating.
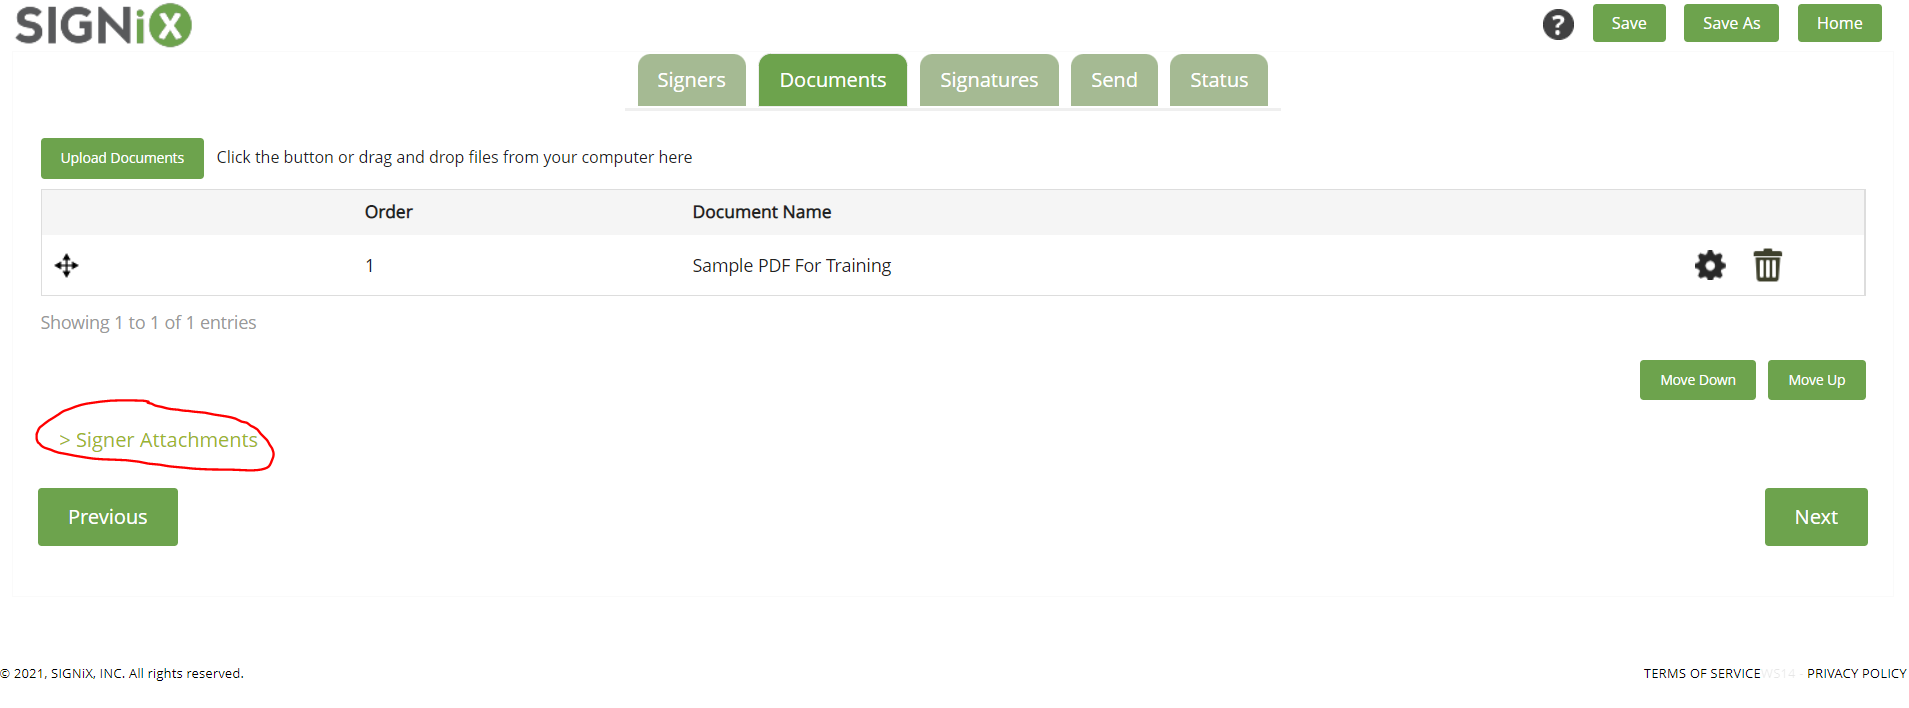
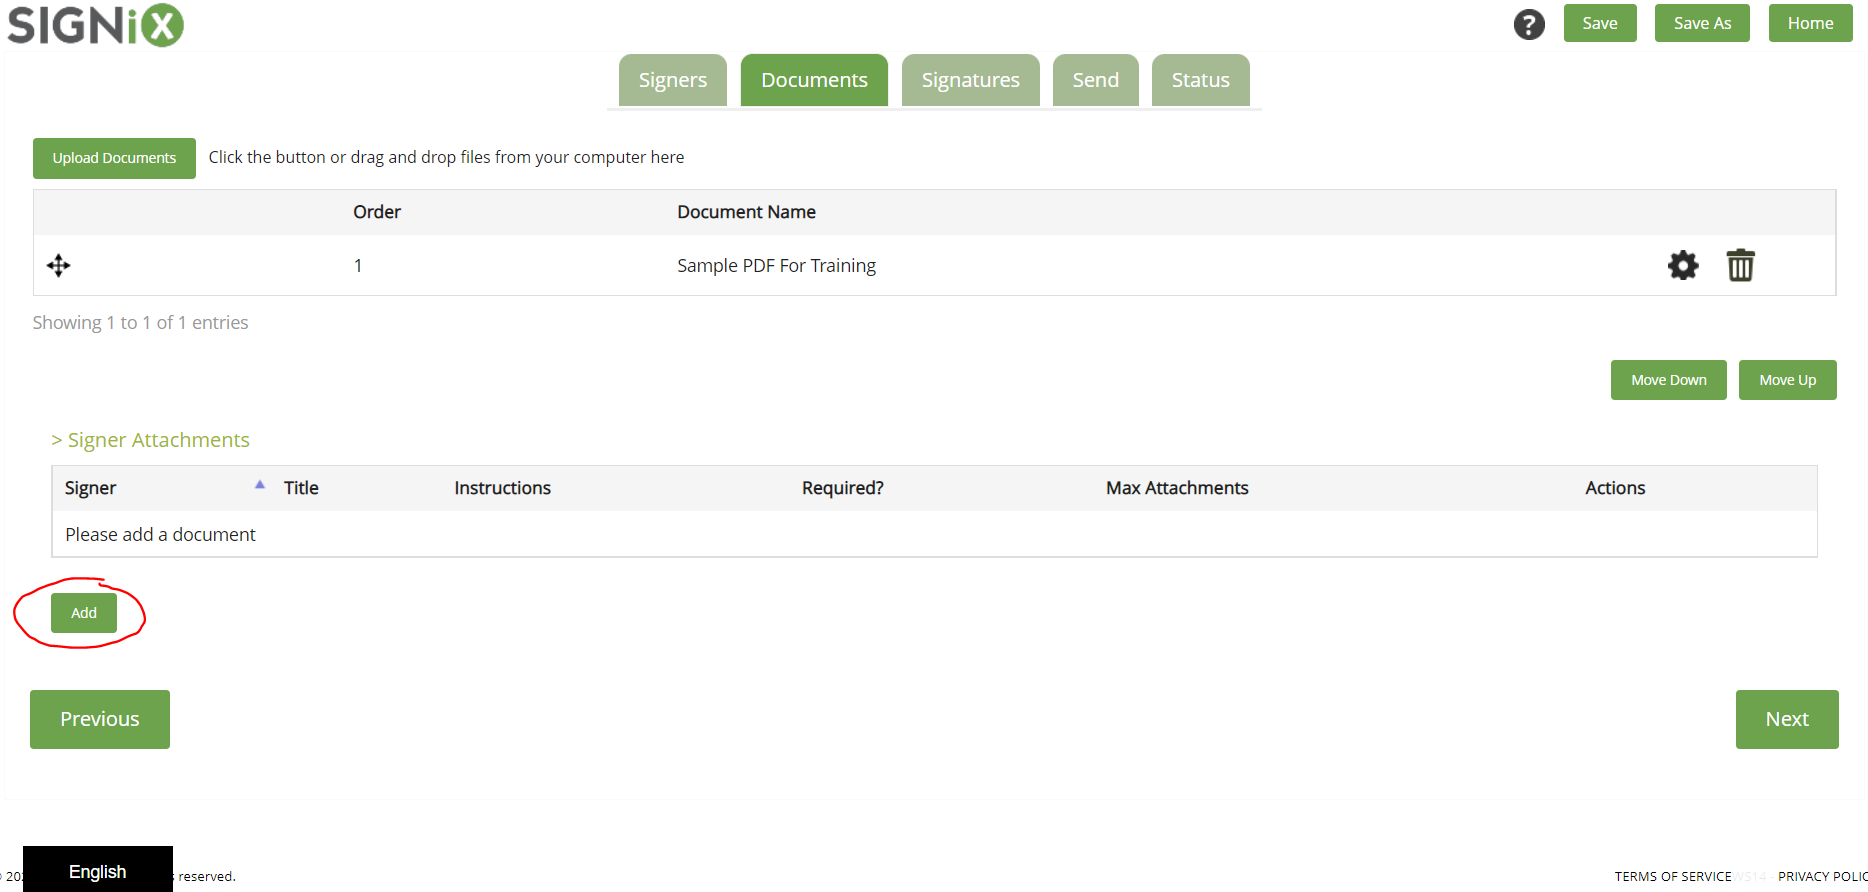
When you click on the link, it will ask you to "Add" a document.
By clicking on the "Add" button, you will see a new prompt that explains how the feature works and guides you on setting it up correctly.
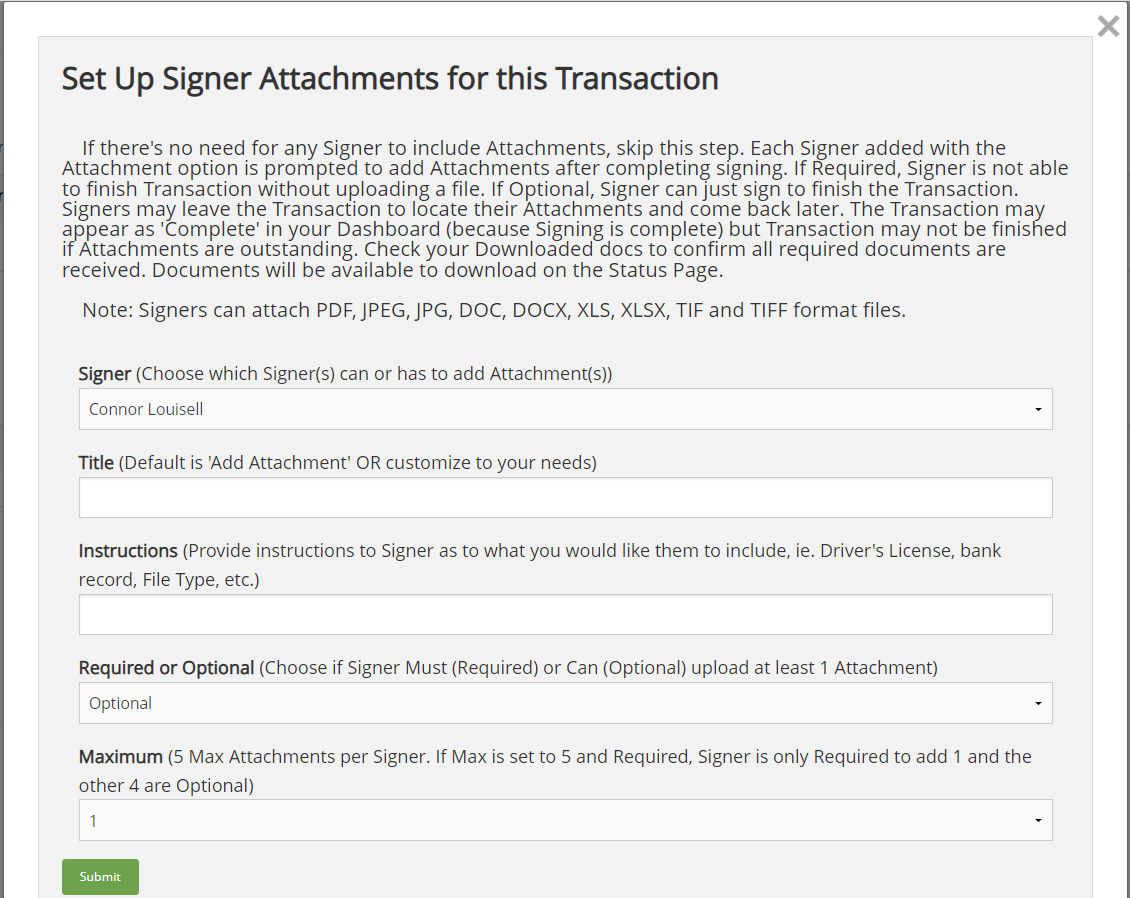
When the Set Up Signer Attachments prompt appears, it will explain in detail:
If there's no need for any Signer to include Attachments, skip this step.
Each Signer added with the Attachment option is prompted to add Attachments after completing signing.
If Required, Signer is not able to finish Transaction without uploading a file.
If Optional, Signer can just sign to finish the Transaction.
Signers may leave the Transaction to locate their Attachments and come back later.
The Transaction may appear as 'Complete' in your Dashboard (because Signing is complete) but Transaction may not be finished if Attachments are outstanding.
Check your Downloaded docs to confirm all required documents are received.
Documents will be available to download on the Status Page.
Note: Signers can attach PDF, JPEG, JPG, DOC, DOCX, XLS, XLSX, TIF and TIFF format files.
You will be able to choose which signer(s) on the transaction are able to upload documents by selecting them from the first drop down menu.
You will be able to add a "Title" to this add attachment prompt to customize it for your needs.
You can provide Instructions to the signer as to what exactly they are expected to upload.
You can choose whether it is Required that they upload something, or simply Optional.
You are able to set a Maximum limit on the number of files the signer can attach - if the Max is set to 5 files, and the above option is set to Required, then they are only Required to attach 1 file and then the other 4 are Optional.
Once you have selected the appropriate options for one of your signers, you will click the "Submit" button and those options will be displayed on the Documents screen under the "Signer Attachments" link. You can repeat the process as necessary, if you have more than one signer on the transaction.
What does this look like from the Signer's Perspective?
The signing process will remain mostly the same for your signer. They will login as normal, and begin signing the documents that you included for them. They will be prompted to Finish after the complete their last signature task.
Then they will be brought to the "Add Attachments" screen, or if you choose to give it another "Title" in the above step, they will see that Title at the top of the screen instead.
The instructions you entered in the above step will be displayed for the signer to see.
The signer should click on the "Add Attachments" button if they are ready to upload the requested files from their computer to the transaction.
It will list how many documents are Required, and the Maximum number.
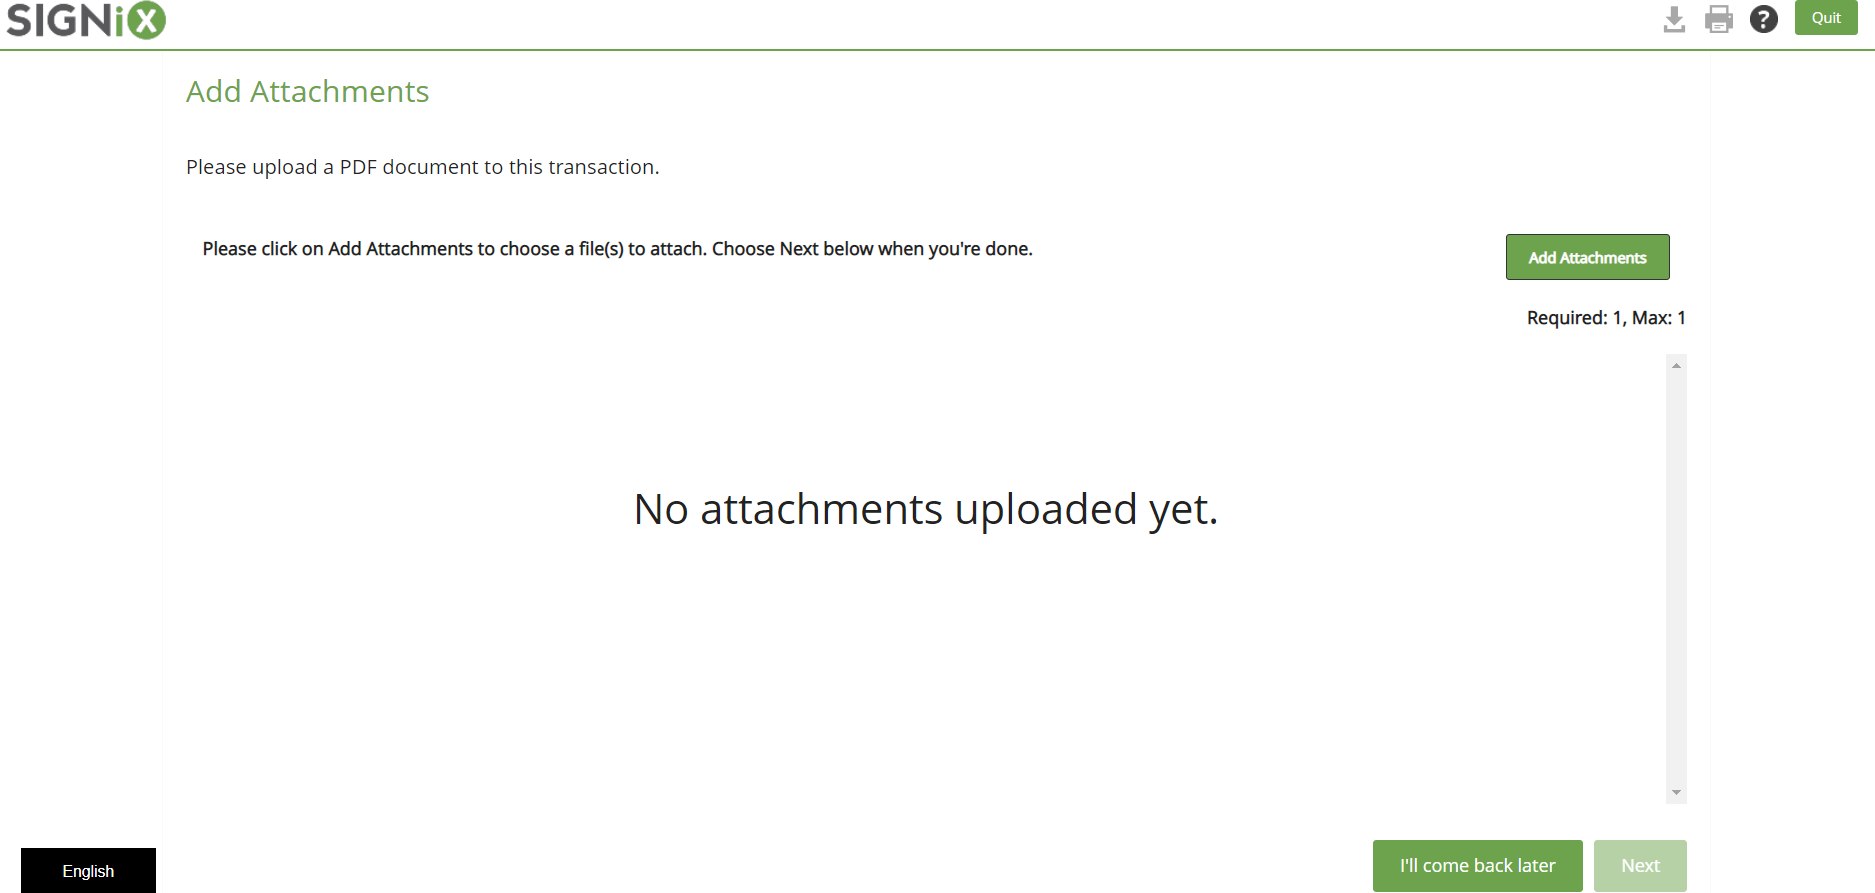
Toward the bottom of the screen, there is a button that says "I'll Come Back Later" which is there in case they need more time to prepare their files to be attached. For example, if they need to attach an image of their drivers license and they need time to take a picture, they can come back later and resume this process when they are ready.
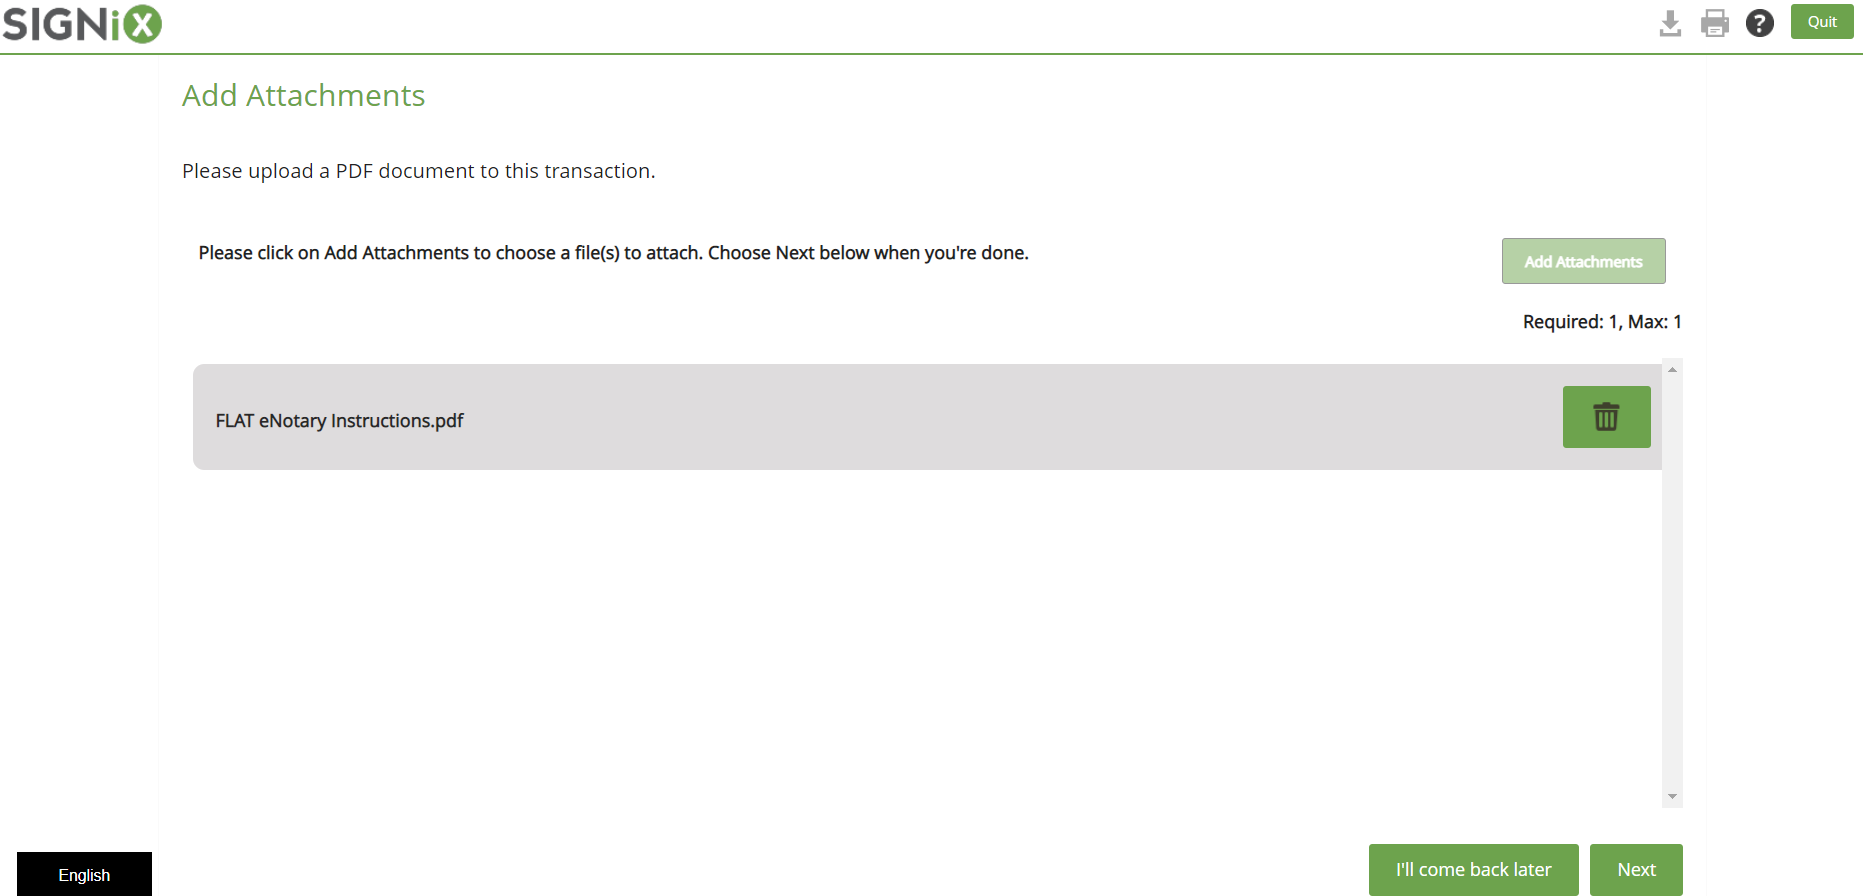
Once the documents have been attached, they will be displayed in the middle of the screen.
If the wrong document was attached, there will be a trashcan icon they can click on to remove it and try again.
Once the signer is ready to move on, there is a "Next" button at the bottom right of the screen.
When they click on the "Next" button, there will be one final prompt asking if they are ready to attach the file(s) they included, this allows them one last check to ensure they have done it correctly before they finish. If they want to go back, they can click on the "Let Me Review" button, otherwise they can click the "Yes" button to proceed.
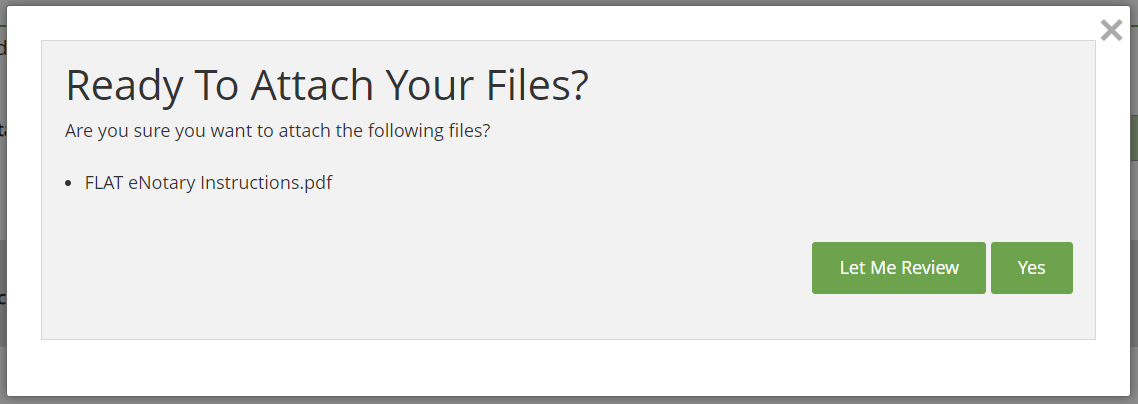
After clicking on "Yes" then the signer is fully finished with the entire signing process, including the attachment step.
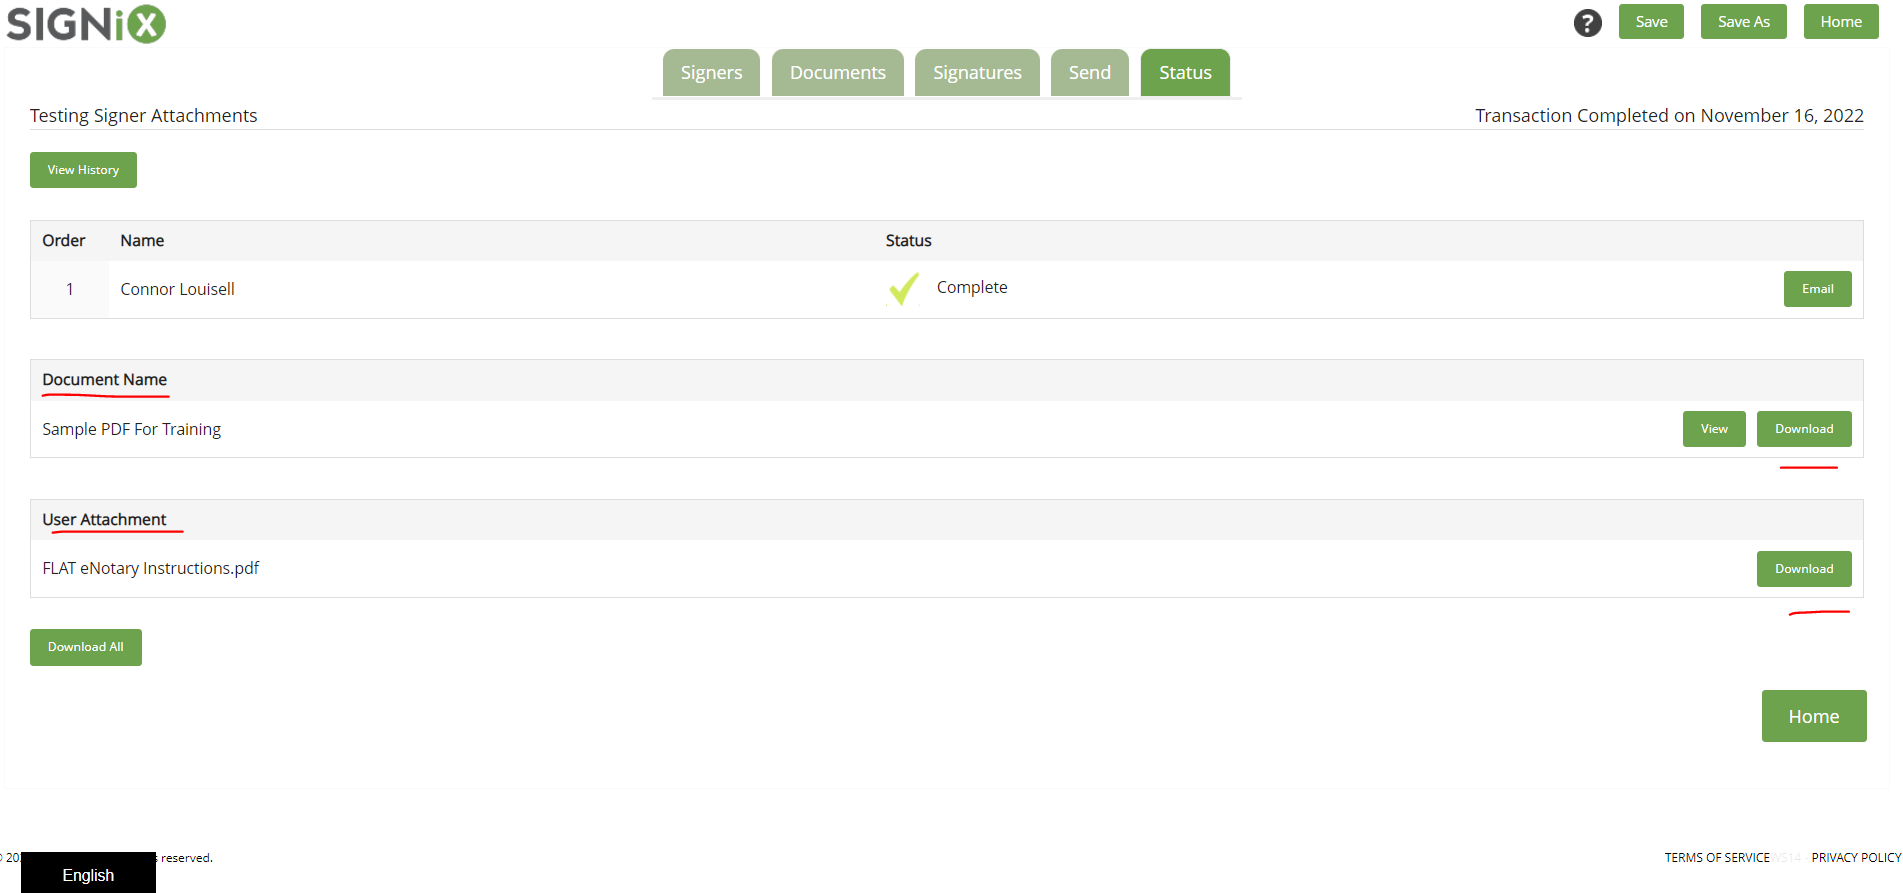
How do I get the attachments once everything is Finished?
The person who created this transaction will now be able to download not only the signed document(s), but also the signer attachment(s) from this transaction.
On the Status screen of the transaction, there will be a "User Attachments" section below the documents from the transaction, and a "Download" button to save them to your computer.