Note: You must place either a signature or initials for the signer first, before you can place any other fields for them on the document.
All fields can be edited by clicking on the gear icon above them and each will have different settings that you can adjust.
All fields can be re-sized by clicking on and moving the lower right hand corner of the field.
Checkboxes:
When you need to have a signer select an option on the document, you can place a checkbox for them to click on. You can even have the box pre-checked if you want to go ahead and fill out the form in advance. If you place multiple check boxes, they are all independent from one another.
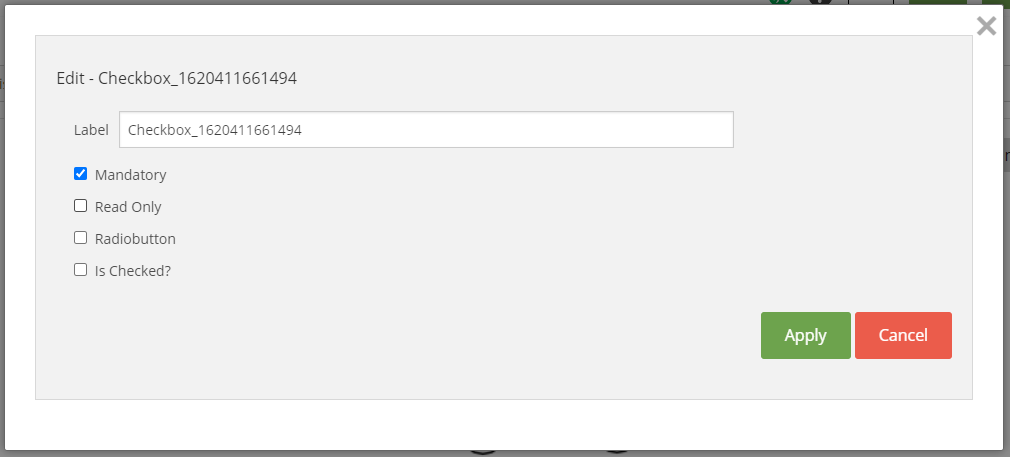
Checkbox Settings:
- "Mandatory" means the box has to be checked by the signer before they can complete the signing process.
- "Read Only" means the signer does not have to check the box, it will be optional during signing and they can skip it.
- "Radio Button" is covered in the next point below.
- "Is Checked?" means you as the submitter can already check the box for your signer, and they will not have to do that during signing because it will already be pre-checked.

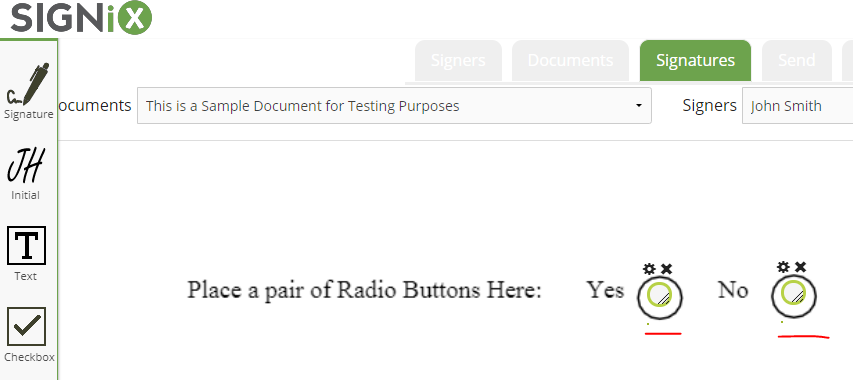
Radio Buttons:
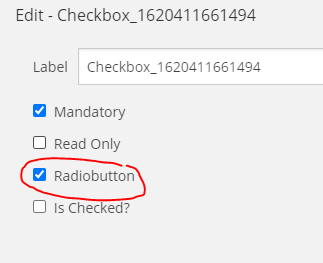
You can turn a single checkbox into a pair of radio buttons, for situations where you signer needs to choose one of two options, like a "yes or no" question. This can be done by using the gear icon to access the checkbox settings. Radio buttons are connected to one another, so only one can be selected by the signer, not both.
Radio Button Settings:
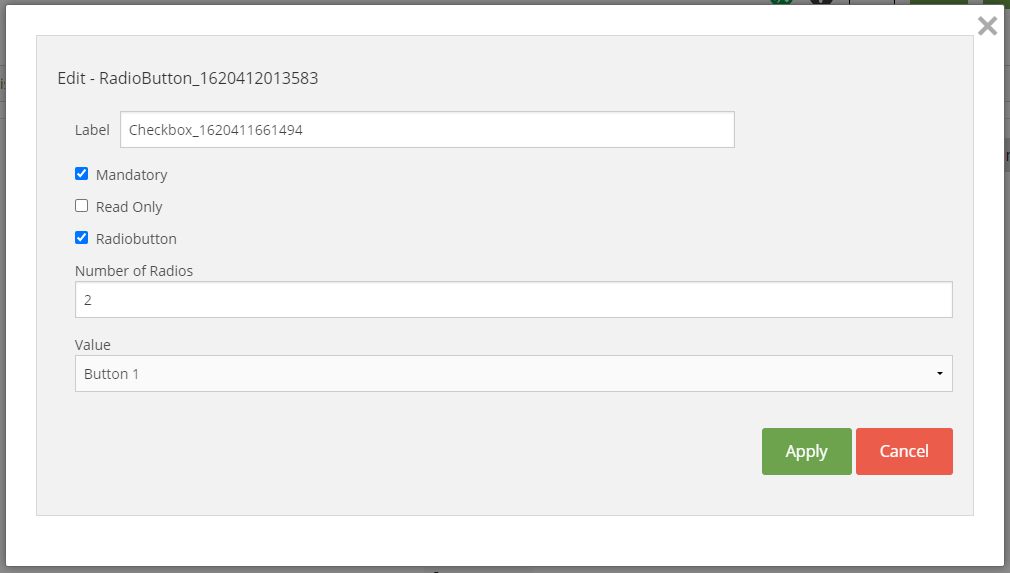
- "Mandatory" means a button has to be clicked by the signer before they can complete the signing process.
- "Read Only" means the signer does not have to click a button, it will be optional during signing and they can skip it.
- "Radio Button" should remain checked to keep these buttons, as unchecking this setting will turn them back into a Checkbox.
- "Number of Radios" means you can have more than 2 buttons, which are all connected. This is good for when signers must select one option from a list of several.
- "Value" means you can already pre-click one of the buttons for your signer and they will not have to do that during signing because it will already be pre-checked.
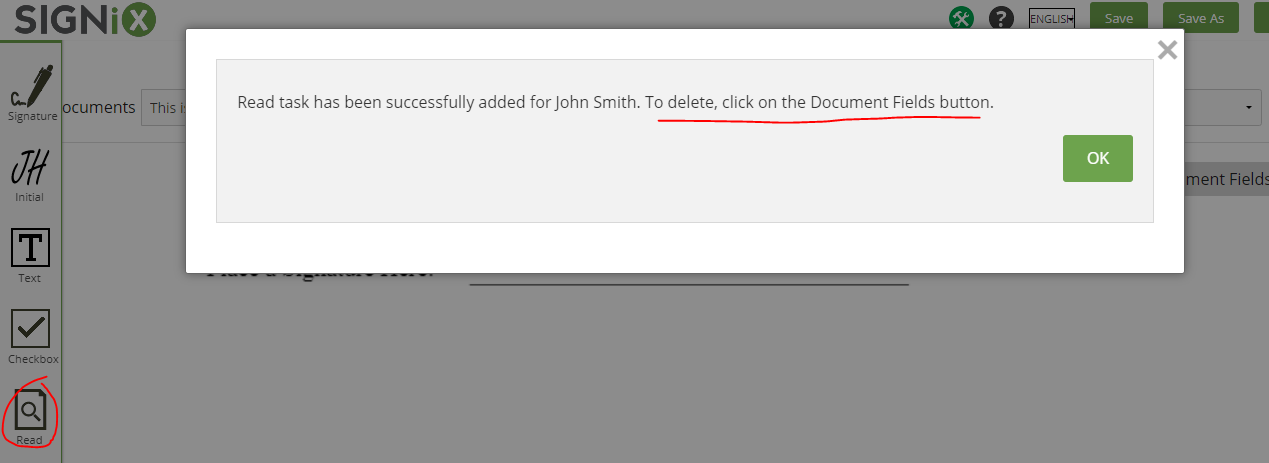
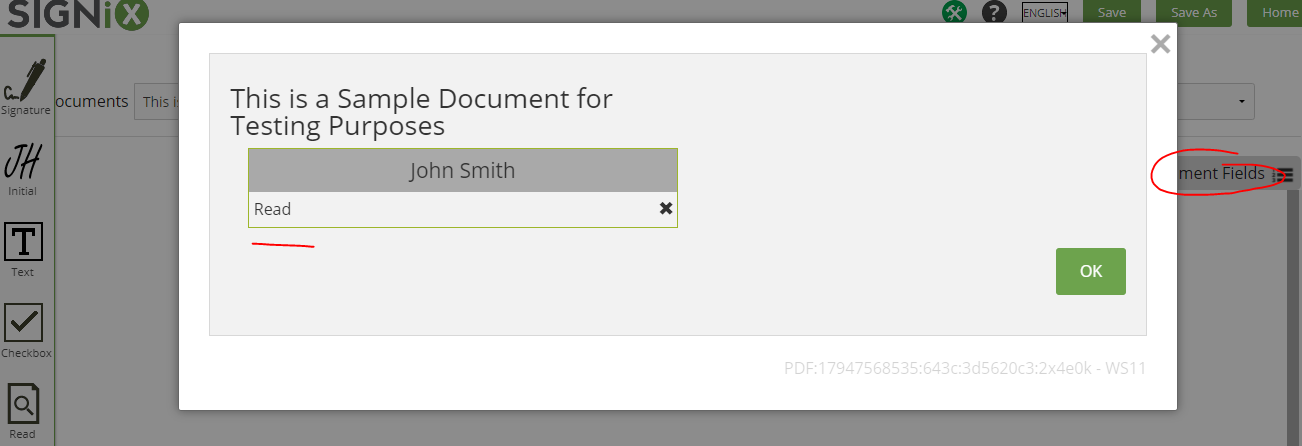
Read - this is a non-action and is meant for when you need to include a document that no one has to act upon, since you can't have a document with no tasks. Signers don't have to click anything when there is a read task, they can simply scroll past the document and continue with signing.
This is a "Document Wide" task so no other tasks can be placed onto the document.
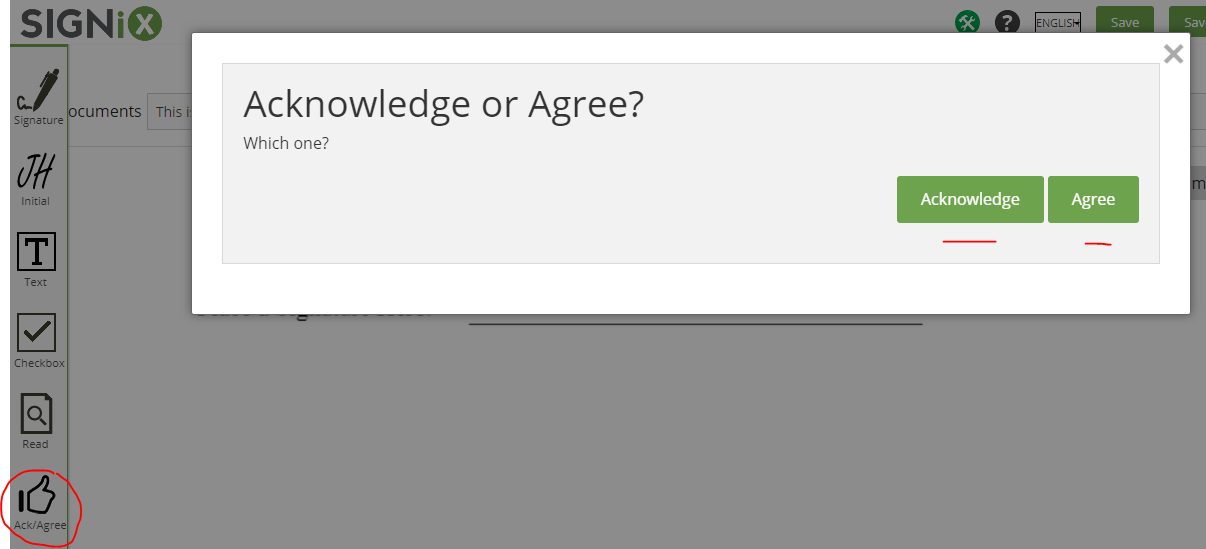
Acknowledge / Agree:
This is meant for when you need to include a document that doesn't need signing but does require the signers to confirm they have read it. This will not leave any marks on the document, but it will be recorded in the audit trail that the signer either acknowledged or agreed to it. Both options work the same way, so you can choose which suits the needs of your document. Signers will have to click a button to perform this action.
This is a "Document Wide" task so no other tasks can be placed onto the document.