You are creating a new transaction, and you have already added your client as a signer. Now you need to add yourself as the notary to the transaction so that you can also sign and notarize the documents.
Here are some instructions to help you with that process, because you must have a notary added before you can tag the documents for notary seals and in order to schedule a Zoom meeting for the transaction.
Steps You Must Take:
Ensure you have already entered your information and added your notary seal image to your eNotary Profile page: Click Here for More Info
- The notary must always be the last signer in the order, so make sure everyone else is already added
- Click on the "Add New Signer" button
- Do not type anything at all
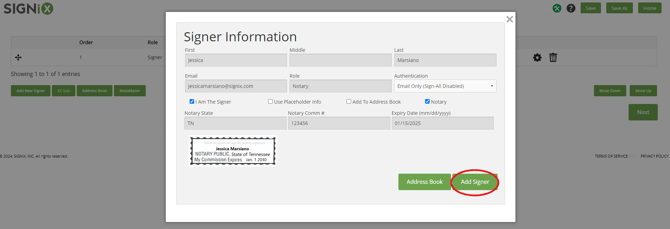
- Click on the "I Am The Signer" checkbox, and you will see your name and email automatically entered for you
- If there is a problem with your info, please stop and correct your information within the user profile.
- Click on the "Notary" checkbox, and you will see your notary info automatically entered for you
- You must click on these checkboxes in this order, or else you may encounter errors
- Select the "Password Only" authentication option for yourself each time.
- Click "Add Signer" and you're ready to move onto the next step of adding documents to your transaction.
-
Relevant Screenshots: