How to add Someone Else as the Notary
Our system allows for a non-notary user to add someone else as the notary to their transaction. It is a quick and easy process, all the user needs to know is the notary's email address.
There are situations where the person creating the transaction is not the notary themselves, and instead needs to add someone else to the transaction as the notary. This is not a problem, and it's easy to do with these instructions.
First, Click on the "Create a New Transaction" button to begin setting up your transaction.
Next, add the clients as signers to the transaction, as you normally would. Enter their name, email, and select an authentication method.
Then, when you are ready to add the notary, click on "Add New Signer" and then type the notary's email address into the email field.

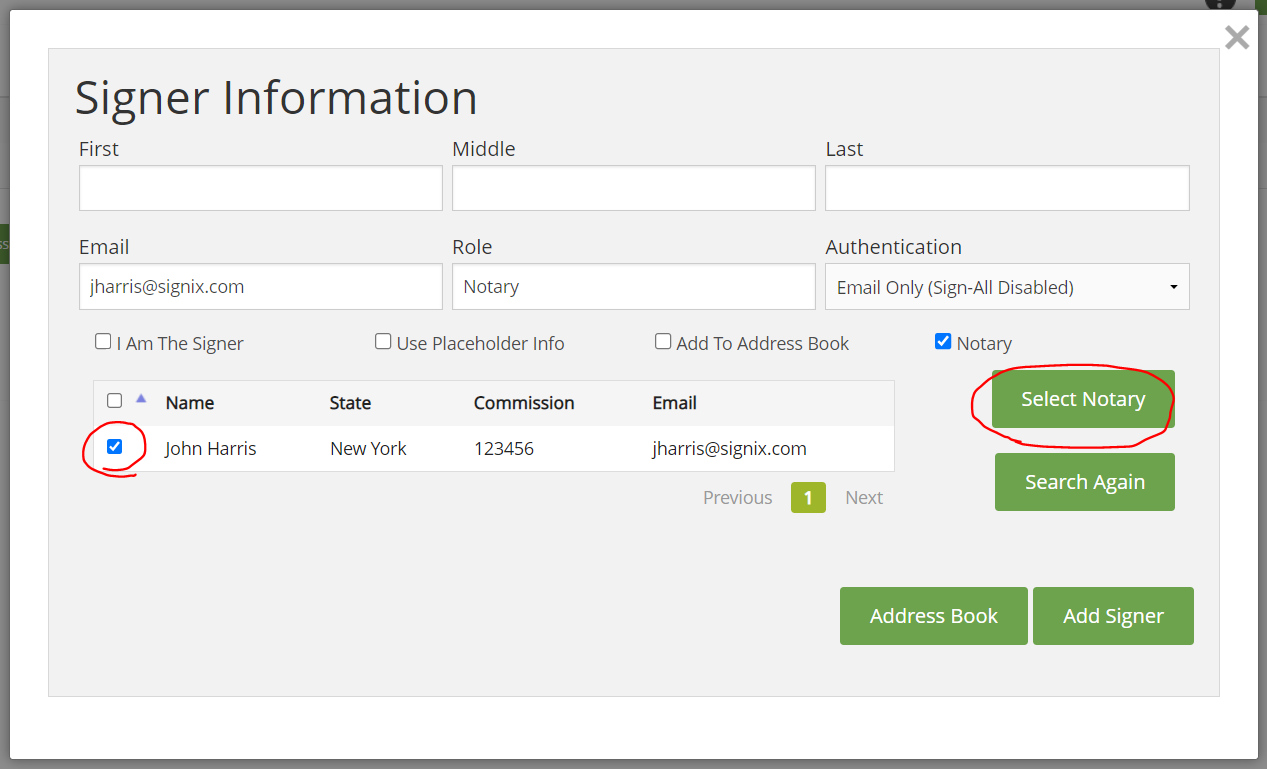
With the email typed in, click on the "Notary" checkbox, and the system will do a search for that notary's email in order to pull up the rest of their information. Notary emails should be unique in our system so there should only be one search result, if that email is on file with us.
Once the search results appear, check the box beside the notary's name to choose them, and then click on the "Select Notary" button.

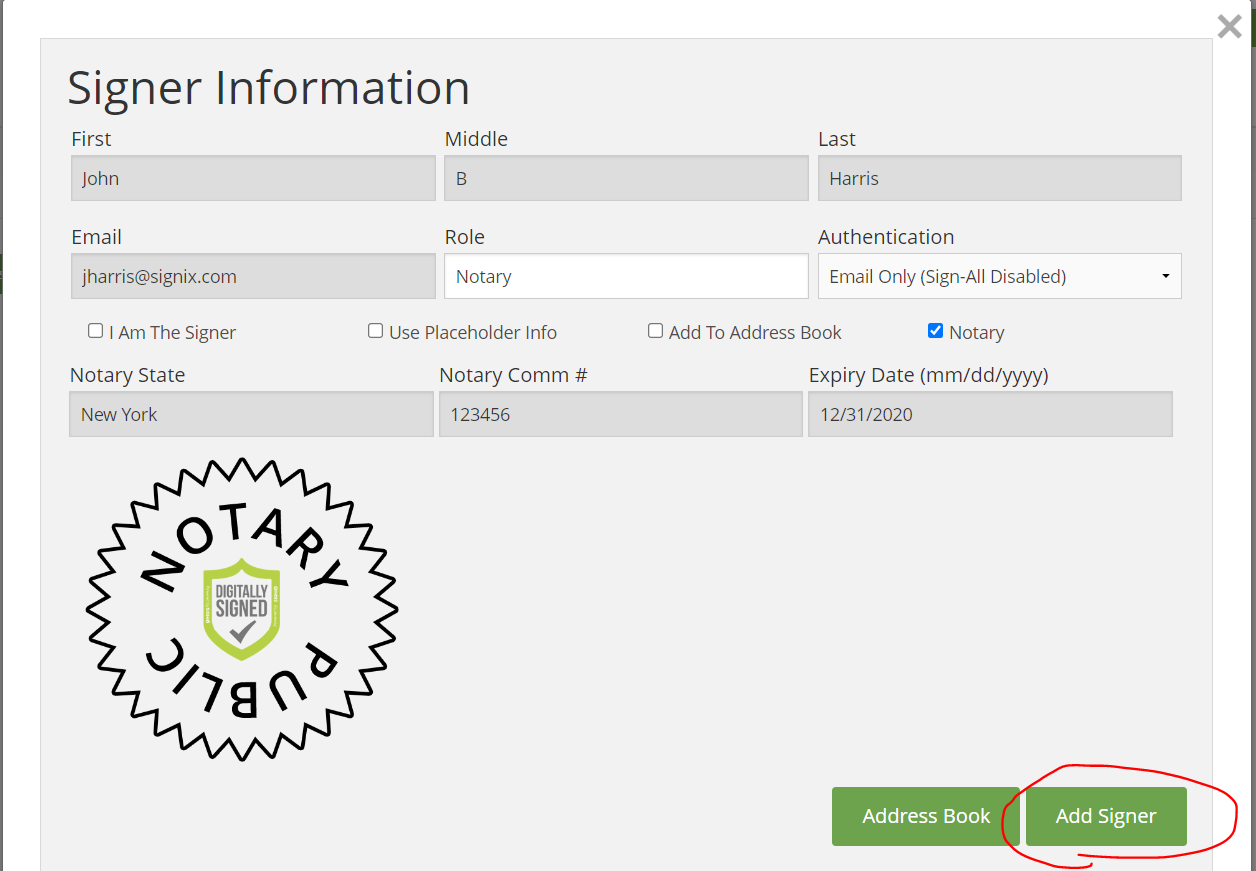
You should see the rest of the notary's information populated in the signer fields, including the image of their notary seal displayed on the screen.
Click the "Add Signer" button here to add them as the notary onto your transaction.

You can now proceed like normal with transaction creation, with adding the documents and signatures just as you normally would. You can even schedule the Zoom meeting for the clients and the notary when you Send the transaction, and everyone will get their Zoom invitation via email once it has been scheduled. The notary will be able to host the meeting, and watch everyone sign.
You may need to login to help Stop the Email Hold when it is time for the clients to sign.