The Order while Tagging:
When you are dragging and dropping fields onto a new transaction, the order in which you place everything does matter.
You are likely already used to the rule where you must first place a signature before you can place other fields such as text boxes. This is because the signatures act like anchor points, giving the other fields something to connect onto during the signing process.
If you don’t place a signature first, there will be an error message that says "You cannot place text / checkbox fields on a document that doesn't have an existing signature or initial."
Let’s take that a step further. If you are in the habit of tagging the document from the top to the bottom. Depending on how your document is formatted, you could have a mixture of signatures and text boxes. Again, the order here is important.
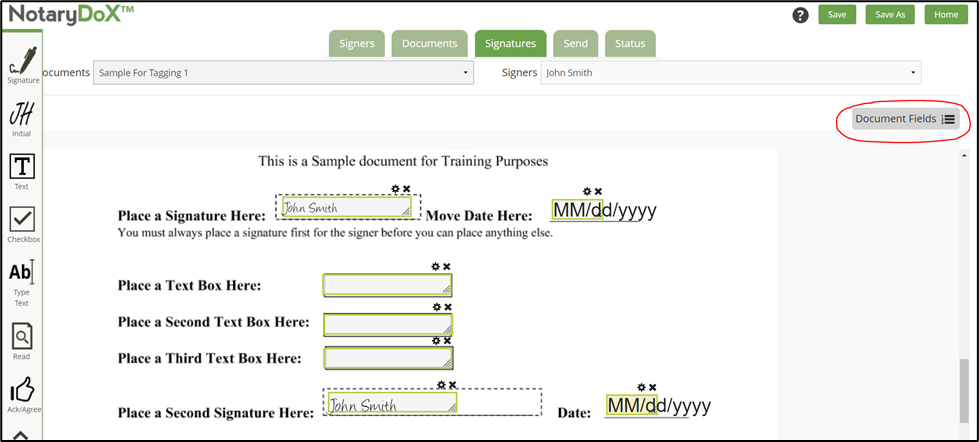
In this example image below, one signature was placed first at the top of the page, then three text boxes were placed next, followed by a second signature. This order of placement will result in the three text boxes being connected to the first signature. You can see this connection shown by clicking on the “Document Fields” button, found towards the top of the screen on the right side.
If you delete a signature, you will also delete any other fields that are connected to it, so we suggest that you take care when tagging documents and Save your work frequently.
You can use the "Save As" button at the top right side of the screen to save your first draft. From there, you can open up your Unstarted transaction using these instructions, and pick up where you left off while tagging. After saving once, you can begin using the regular "Save" button to keep updating the one Unstarted transaction you are working on with new updates.
We suggest taking your time when tagging a document, and go one signer at a time, one document at a time. This should help you ensure that each field is placed in the desired order, and assigned to the correct person. The fields are color coded to help you keep track of who they belong to, with green as the first signer, blue as the second, and so on.
To switch between signers, use the drop down menu at the top right of the Signatures screen to select which signer you are currently tagging for, and be sure to change as needed. If you accidentally assign fields to the wrong signer, you will need to delete those fields off the document and place them again after selecting the correct signer.
The Order while Signing:
When it comes time to have your documents signed, the order in which the fields were placed becomes somewhat reversed. The system will expect a signature to be the very last action that the signer performs before they are allowed to Finish the signing process.
This means that they will be expected to complete any text boxes, or other fields, connected with each signature first before they sign, not afterwards.
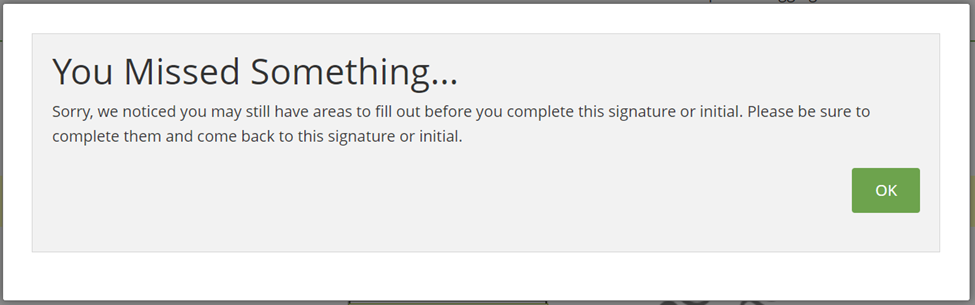
This order works great if your document is formatted with the text boxes at the top and the signature at the bottom. The system will go from the top of each page to the bottom, and it will alert the signer if they have missed a field if they try to sign too early.
When this alert appears, their signature will not be placed, and clicking the “okay” button should bring them to the area where they have fields left to complete. Then, they can return back to the signature and complete it before moving on.
However, not all documents are formatted the same.
If you happen to be working with a document where the text boxes are below the signature they are connected to, then you may need to let your signer know in what order they should perform each action while in the signing process.
For the purposes of brevity during these instructions, please know that the initials field will work much the same as a signature when it comes to the order everything is placed.
If you want to make things easier on your signers, then you could adjust the order in which you tag your documents before sending them to be signed.
For example, if you place all of the signatures for your signer first, and then place the text boxes, that will ensure the text boxes are connected to the very last signature.
This order should help make the signing process a bit easier, so long as the last signature is located below or after all of the text boxes on the document so that they will naturally fill everything out before trying to finish.
Remember to use the “Document Fields” button to check your work, and if you click on a field, you’ll be brought to that one on the page, which helps you keep the order of everything organized.
This logic behind the order in which you place fields can be a little confusing, so we will be using an example document here in this article to illustrate it for you.
Visually, these two examples look the same on the page, so if you are not already using the “Document Fields” button, we suggest you begin so that you can check the order of your fields and adjust as needed
Here is what the example document looks like for both scenarios:
Example One:
The fields are tagged in the order they appear on the document, top to bottom.
- First signature
- Three Text Boxes
- Second Signature
In this example, based on the tagging order, the signer will need to complete the fields in the following order:
- Three Text Boxes
- First Signature
- Second Signature
Why? Because the text boxes, based on the order during tagging, are connected to the first signature and therefor must be done before the first signature.
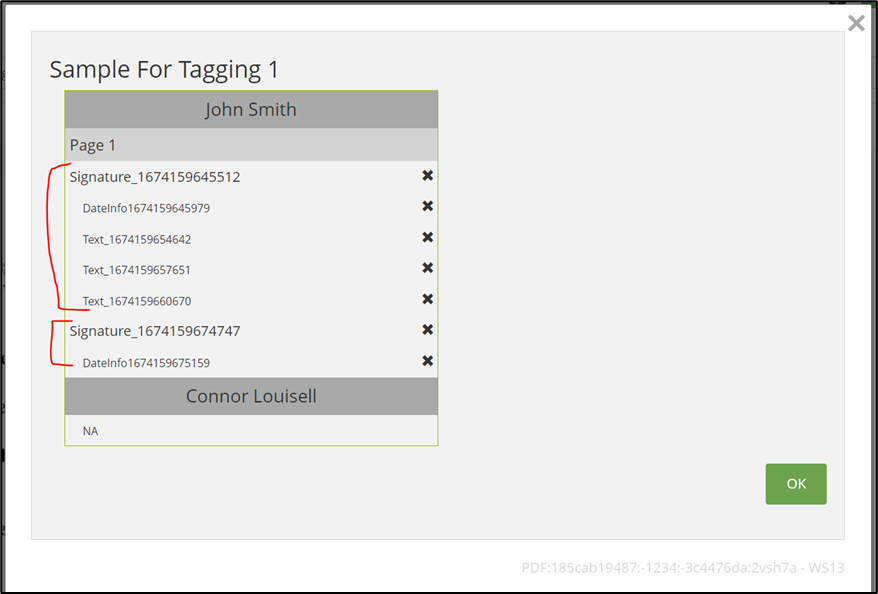
Here is the Document Fields window that shows this tagging order:
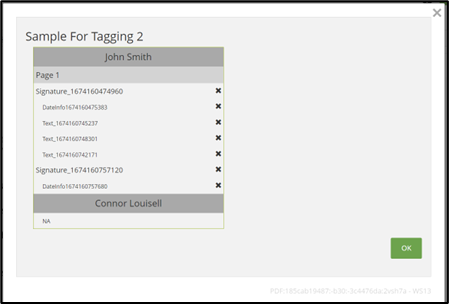
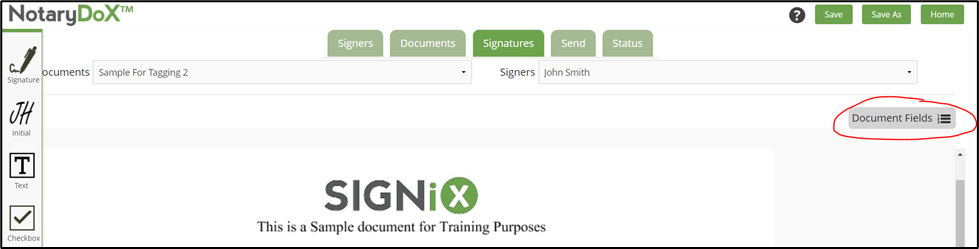
Example Two:
To avoid confusion for your signer, you might get out of the habit of tagging fields as they appear on the document, and instead tag all signatures first, then tag any text boxes.
Here is the new tagging order:
- First Signature
- Second Signature
- Three text boxes
In this new example, based on the adjusted tagging order, the signer will now need to complete the fields in the following order:
- First Signature
- Three Text boxes
- Second Signature
Why? Because the text boxes were placed last, they are connected to the second signature instead of the first one. Signing expects the signature to be completed after the text boxes, so by connecting all of the text boxes to the very last signature, signing can happen in a more natural order.
Here is the Document Fields window that shows this new tagging order:
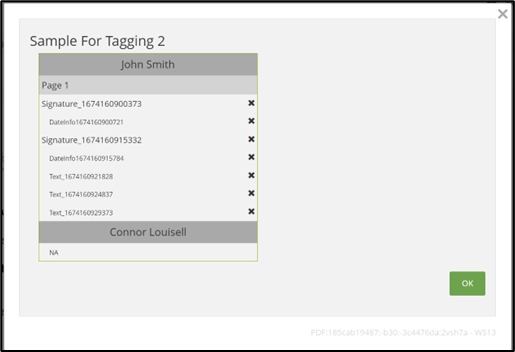
You may be asking yourself ... Why does the system needs to order things in this way?
Great question.
The SIGNiX e-Signature system has to keep track of everything, so by connecting fields to each other and using the "major" actions like signatures and initials as anchor points for "minor" actions like text boxes, this helps the system log every action taken during signing in a uniform manner.
The order of tagging and then the order of signing can be a little difficult to remember at first, so clients are encouraged to practice and ask questions.
Send your questions here: CustomerSupport@signix.com