After much feedback from clients, we have changed our process for capturing the ID pictures that signers need for Credential Analysis during a notarial transaction.
This is a long article with a lot of information, we suggest you read it carefully and in its entirety to gain a better understanding of this new process. Notaries may wish to perform a practice transaction to test this out first before going live with a client.
You will still select the "KBA ID - Knowledge Based Questions with ID SSN 4" option when creating your transaction and adding signers whose identity you need verified.
All other steps of creating your transaction will remain the same.
Once you are on the Zoom meeting with your signer(s), then you can login to your account and stop the email hold on the Status screen, and proceed as normal. The system will email the first signer a link to access the documents.
Your signer will still be asked to enter the expiration date of their ID first, then they will see the "Stop" message where they are told to wait for the notary's permission to continue. The signer still needs to accept legal consent, then enter the last 4 digits of their SSN and their full DOB.
The KBA questions aspect of the authentication is the same.
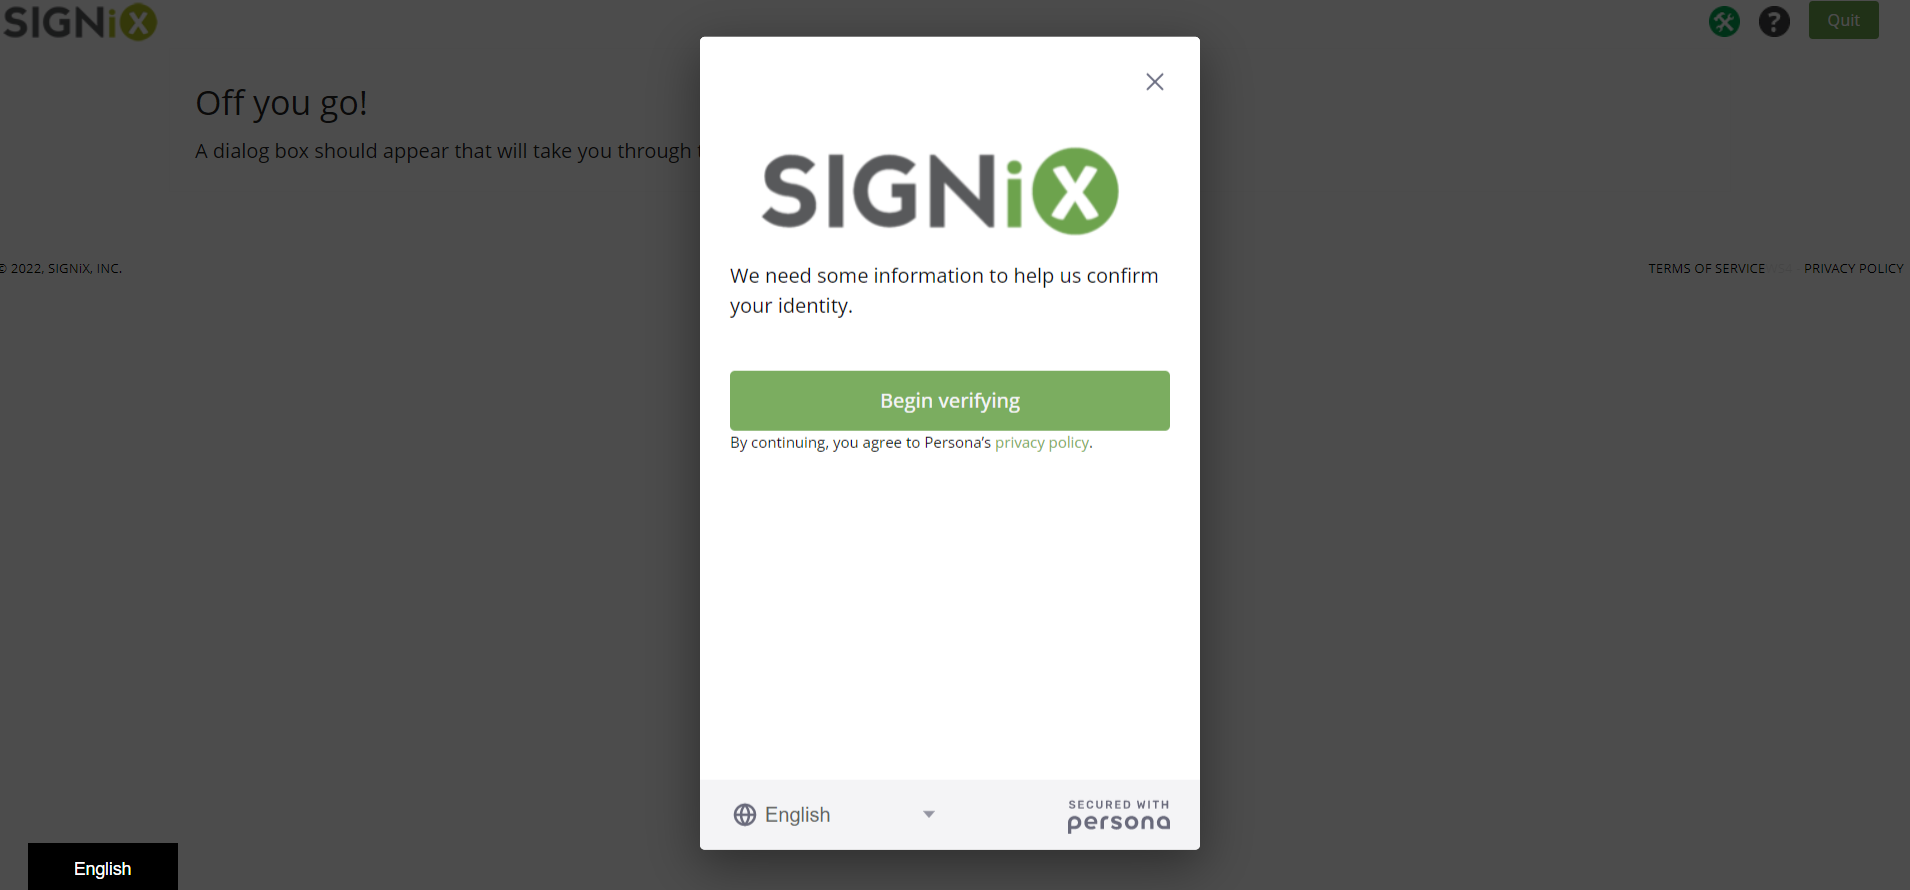
Once your signer finishes the KBA questions, they will briefly see a message that says "Off you go" and then they should see a pop-up window on the screen.
This process should keep the signer within the browser, so they don't need to take out their phone, unless for some reason they prefer that method.
The signer will click on the "Begin Verifying" button to start this process, which has a time limit, and should be done quickly to avoid being timed out.
Next it will ask them to choose the country where their ID is from. Then the signer will choose the type of ID they are using from the options available, including common forms like Driver License and Passport. There is also a clear separate option for Passport Card, instead of the booklet.
The Notary is responsible for knowing if their state allows for expired IDs, foreign IDs, and what forms of ID are acceptable for RON.
SIGNiX cannot tell notaries what is acceptable, as every state and situation can be unique and different. Our system is setup to allow notaries to choose the options that best suit their needs at any given time.


Windows computers have a limitation where only one program can access the web camera at a time. This means that if the signer chooses to use their web camera for taking the ID picture, they will first need to stop sharing their camera in Zoom until the picture is taken.
This is actually a good thing, to avoid accidentally recording the ID in the Zoom meeting. Just as you don't want to record the KBA questions that contain personal information, you don't want to record their ID either.
The Notary, as the Host of the Zoom meeting, can actually help the signer with stopping their video in the meeting, and then once the ID picture is taken, the signer can begin sharing their camera in Zoom once again.
This does not mean that the signer has to leave the Zoom meeting, just that their camera is off in Zoom for a short period of time. They will still be in the meeting, able to speak with you over audio, and then their camera can be turned back on while they sign the document.
If you do not wish to turn off your signer's camera in Zoom, then you need to instruct them to choose one of the other options: Upload a Photo, or Continue on Another Device.
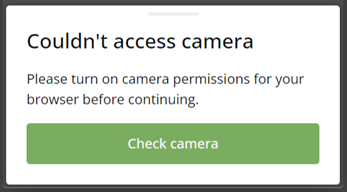
Signers may see a small error if the program is unable to connect with the web camera.
Next, the signer will be prompted to take a picture of the front of their ID, and they will be presented with a Camera button, or a "Continue on Another Device" button.
**NOTE - they must take a live photo of their ID, they cannot upload a picture already taken from their device. Taking a live photo in the moment proves they have their ID physically with them, as a security measure.
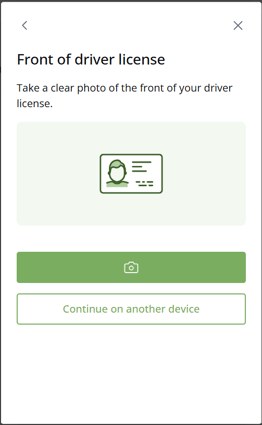
There is a button with a small camera icon, which will allow the signer to connect with their web camera to take a live picture of their ID.
This is the newest part of the process that we believe will make the ID picture step of KBA much easier, because now they can hold their ID up to the web camera on their computer and take a picture.
The other options shown here will be discussed later in this article. For now, the following instructions will assume that the signer is using a computer or laptop, has chosen the camera button to proceed, and has turned off their camera in the Zoom meeting.
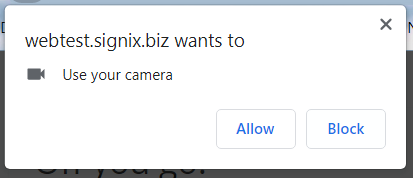
If this is the first time that the signer's browser has tried to access their web camera, there may be a small pop-up showing that our website is asking permission to use the camera.
The signer should click "allow" in order to move forward.
The below screenshot is from the Google Chrome browser, however each browser may have a slightly different way of requesting permission.
Signers should be assured that access to their camera is only used for the purpose of capturing the ID picture and will not be used at any other time for any other reason.
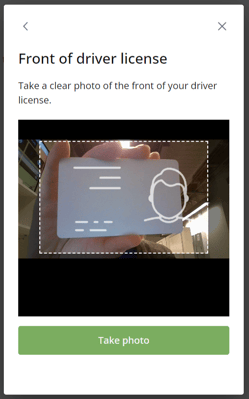
Once the signer has agreed to allow their browser to access their web camera, a view from the camera should appear in a black box on the screen, with an outline of an ID to help guide the signer on where to hold up their drivers license.
There is a "Take Photo" button available to use when the ID is positioned correctly. In some instances, the program may take the photo automatically once it has detected the ID has been placed in the correct position.
Signers should strive to ensure the ID is clear and in focus when taking the picture. It will be a computer program that verifies the ID once the picture has been taken.
It is now okay if the signer's fingers are visible in the picture, as long as they are not covering up important information shown on the front of the ID.
The signer will be shown a preview of the image that they have taken, and can choose to move forward with it, or try taking the picture again if it appears too blurry.
The Drivers License option will require a picture of both the Front and Back of the ID.
Other options such as the Passport will only require a single picture.
If the signer takes too long with their ID picture, a message will appear in the background, warning them that their session is about to expire. They have about a minute to finish taking the ID picture before they are timed out of the login process. If this happens, the signer will need to start over again from the first step of login and go through KBA.
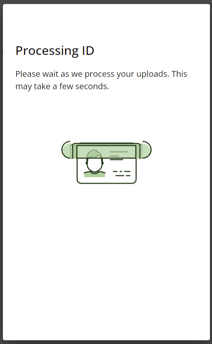
After the signer has taken the picture of their ID, the system will automatically begin to verify the picture and a visual will appear to show that this is happening.
The verification process should not take longer than a minute or two. Signers should make sure they have a strong internet connection to ensure their experience with authentication and signing documents is quick and not delayed with long loading times.
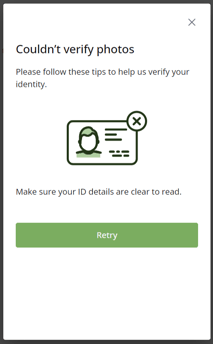
If the ID picture does not pass, they will see a message that says "Couldn't verify photos" and it will offer some basic tips such as making sure the ID details are clear in the next picture.
The signer will click on the "Retry" button and they will be taken back to the previous step of holding their ID up to the web camera to try again.
The signer will again be shown a preview of the image that they have taken, and can choose to move forward with it, or try taking the picture again if it appears too blurry.
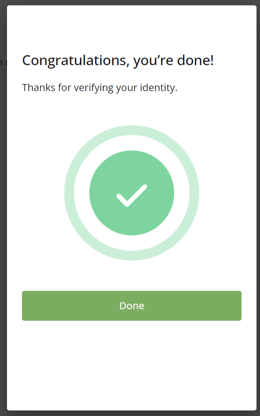
If the ID picture does pass the verification, they will receive a message that says "Congratulations, you're done!" and "thanks for verifying your identity."
Your signer should click on the "Done" button to return back to the SIGNiX screen and proceed with accessing the document, either by creating a password or entering their already established password for signing documents in our system.
The notary may wish to instruct the signer to turn their Camera back on in Zoom, and then they can also begin sharing their screen after this step, if that is required or allowed by their state for RON.
Credential Analysis is now finished!
Additional information:
If your signer does not have a web camera on their computer or laptop, they have other options available to them. They can instead choose to use their phone to take the picture, much like the old process.
It may be wise for the notary to discuss the full RON process with their clients ahead of time, so that they know what to have prepared when the Zoom meeting starts. The login process is time sensitive, and they do not want to be timed out while taking too long to get a picture ready.
By clicking the "Continue on Another Device" button, the signer will see two options presented to them. The screen will explain that "we need access to a camera" and in order to get that access, "we'll send you a secure link for continuing on your phone" with the good news that there's no requirement to download an app.

The two options for getting the secure link on the signer's phone are:
- Scanning the QR code shown on the screen with their phone's camera *
- Clicking the "Send Email" button to receive an email message with the link
* Please note that some older models of phones may not be able to scan the code on the screen. If the signer does not know how to use a QR code or their phone is not compatible, they should choose one of the other two options available.
For instructions on continuing on another device, please see this other FAQ article.