There may be times when a user receives a document from their client that already has fields placed onto it, through a program like Adobe. We call these Pre Tagged Documents, to indicate the majority of the tagging has taken place before reaching SIGNiX.
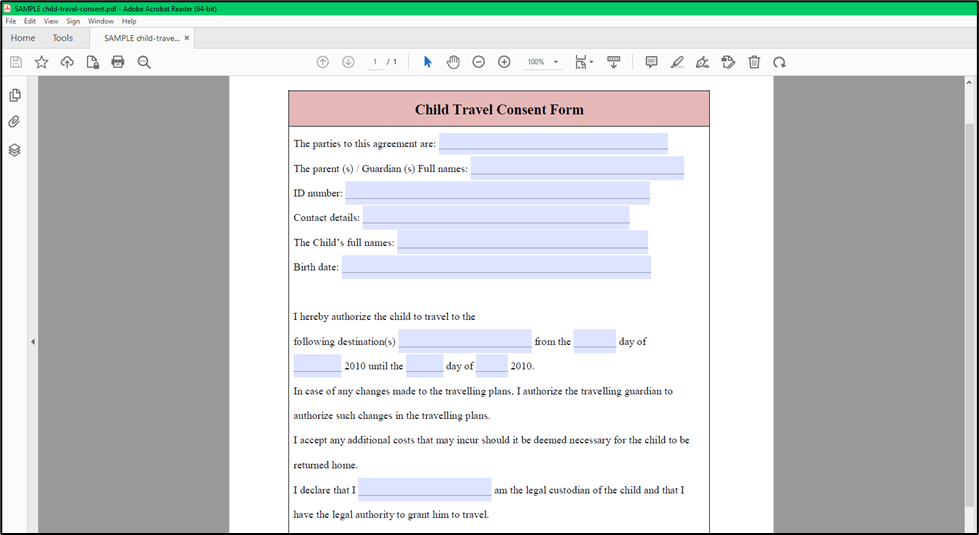
One easy way to tell when a document has been pre-tagged is to open it up in Adobe and check to see if there are fields on the pages.
In this example, you can see the text and lines on the page, then blue rectangles that represent the fields on the page. These are basic text boxes, which can be filled in ahead of time in Adobe, or filled in later within SIGNiX or during signing.
When you try to upload a pre-tagged document into a new transaction in SIGNiX, sometimes you may see a prompt that asks you what to do with the fields that were found on the document.
You have two options for this prompt. You can either assign all of the fields to one of the signers, or you can choose not to assign any of the fields to anyone.
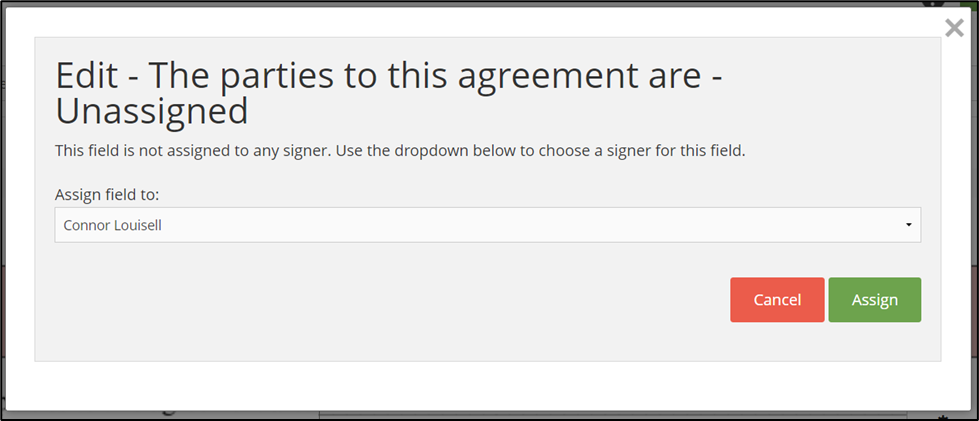
If you want all blank fields to be assigned to one person, select their name from the drop down when this prompt appears.
If you want to assign the fields to several different people, select the Other option and then read on here in this article to find out how to manually assign each field.
Some documents will not cause this prompt to appear, and instead it will upload like normal and you will see the fields when you go to the Signatures screen. When this happens, you'll have to manually assign each field to the correct signer.
If you do not assign the fields to anyone, then no one will be able to interact with those fields during the signing process. We suggest caution and attention to detail here, to avoid mistakes.
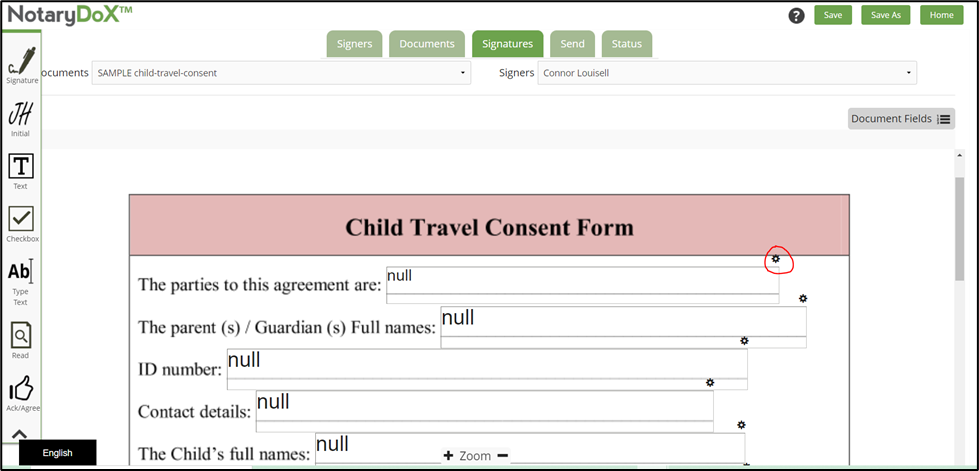
Blank fields will show the word “null” in them. This word will only appear on this screen, and not later during signing nor after signing has completed.
Before you do anything else with the document, remember that you must first place a signature field for the signer, and then you can begin to address the pre-tagged fields that you want to assign to that person.
We suggest that you click on the gear icon above each field and assign it to one of the signers. This will remove the word “null” and then you can adjust the field as you normally would.
How to Pre-Fill a Pre-Tagged Document:
If your Pre-Tagged document has a lot of fields on it, then the process of assigning each one can be rather tedious.
To avoid this, you could fill out any fields you need in Adobe, then you can flatten the PDF before uploading it into SIGNiX so that all you need to do is place the signature fields and start signing.
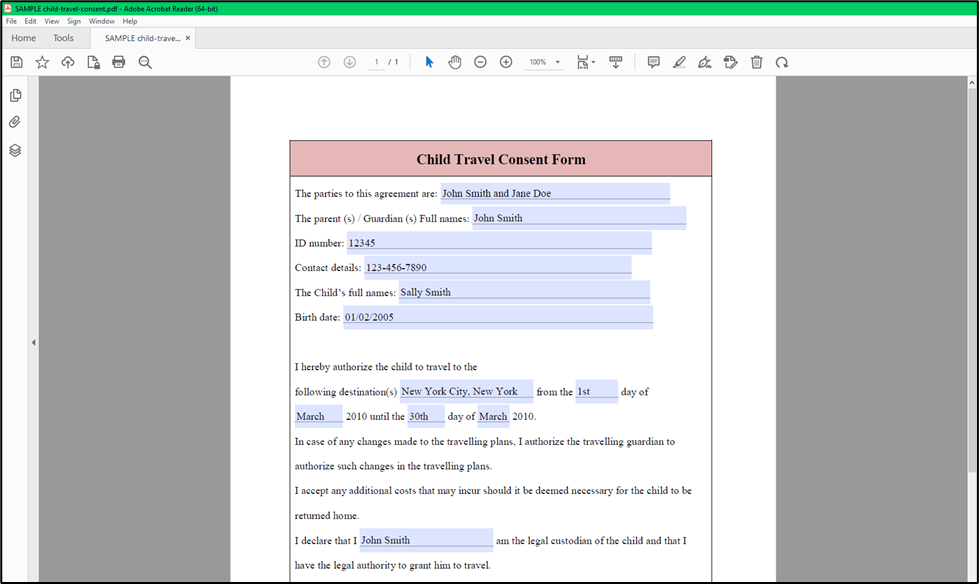
This step should be easy, just click on the field you want to fill out and type inside. For this example image, the document is open in Adobe Acrobat Reader, which is a free program.
Once you have typed in everything you need in the document fields, then you can flatten the PDF.
What is flattening?
Flattening refers to a process of saving the PDF file in such a way that all layers on the document are merged into one. This means objects like text boxes will become simply text on the page that can no longer be edited easily.
Here is our FAQ article on How to Flatten with more details about this process.
This process is also known as Print to PDF because you are using the print feature to save a new version of the document to your computer.
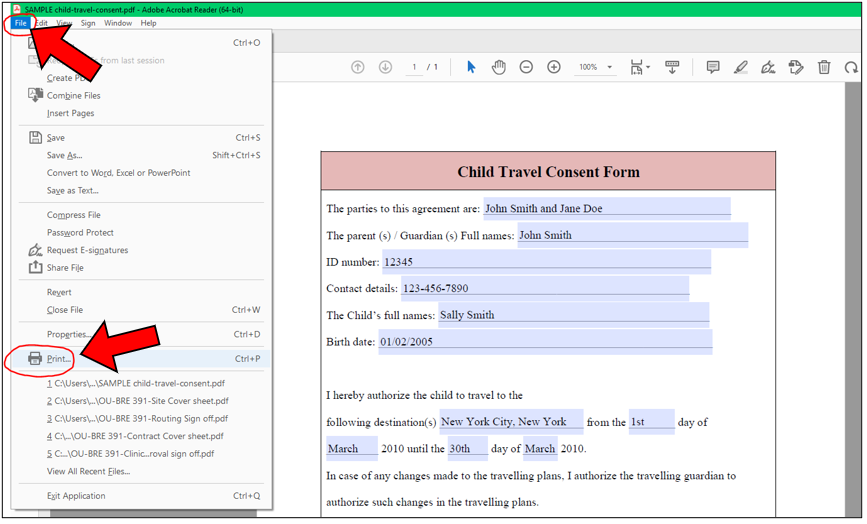
To flatten, I will go to File, then Print.
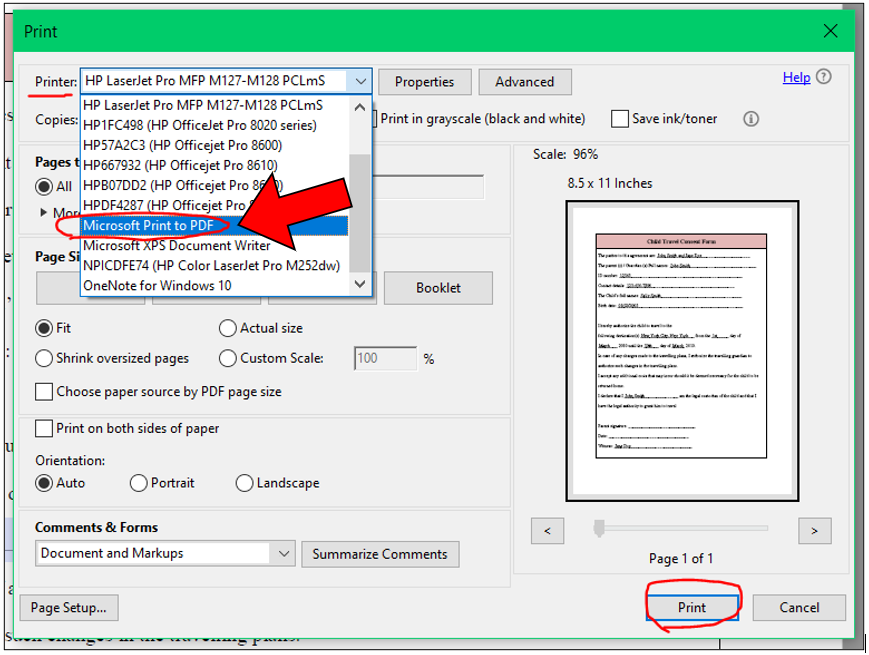
When the Print window appears, I will change the Printer from my physical machine and instead select a PDF program. On many machines, there is an option called Microsoft Print to PDF which works well for this process.
Once this has been selected for the Printer, click on the Print button.
You should be prompted to rename the document, as you are now saving a new version of it.
It is recommended that you give the new flattened document a similar name to the original, so that you can tell the two apart.
In this example, the word “flat” has been added to the PDF name.

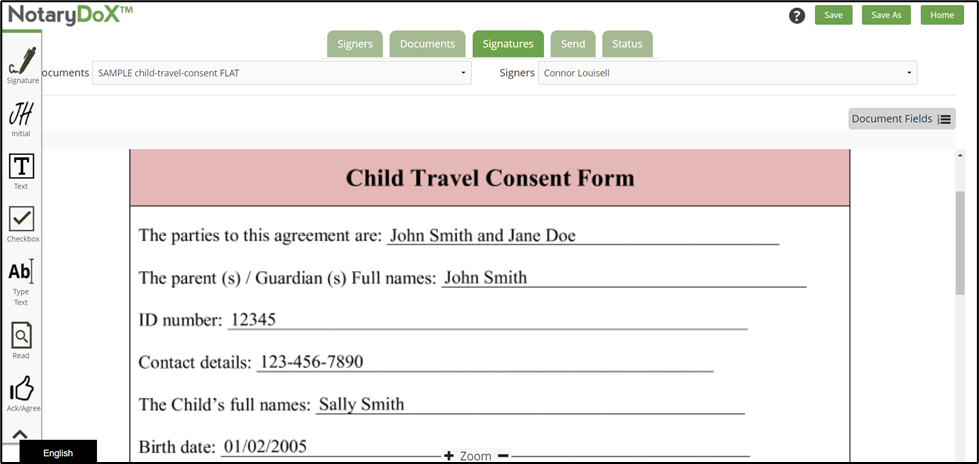
Now when I upload this flat document into SIGNiX, you can see that the fields are no longer there, but all of the text that I typed in before flattening is still there and visible on the page.
All I have to do now is add the signature, and date field, along with anything else that I need, and this document is ready to be sent out for signing.
There may be some situations where the user does not want the document to be filled out ahead of time, and they would prefer to have their client fill it out as they sign.
When you wish to leave the boxes blank so that your signer can fill them out, then you should consider making these fields Mandatory. This will ensure the signer is forced to interact with the fields before they can finish signing. Here is an FAQ article with details on this process.
This is a choice for the user to make for each unique situation. We cannot tell you what is or is not acceptable. Instead we are showing you options that are available for you to choose from when it comes to preparing documents to be signed.